Lone Star Grillz Ten Fundamentals to Better BBQ
Does your barbecue lack flavor? Are you finding it difficult to hit the sweet spot of tenderness? If so, you have come to the right place and all that ends today. We often get asked how to make better barbecue. Lone Star Grillz has developed ten fundamentals to achieving better barbecue. These fundamentals combined with our superior cookers are the foundation of quality barbecue and will earn you the title of Barbecue King of the cul-de-sac.
1. Cook to temperature/tenderness, not time.
We have made this fundamental number one because we believe it’s the most important. You have probably heard people ask the question of ‘Time and temp?” Well, that ends here, and you should remove the phrase from your vocabulary. Invest in a QUALITY instant read thermometer and use it. Notice we put emphases on the word quality? Don’t settle for a cheap knockoff instant read thermometer to save a few bucks. This is the one thing you can do to instantly produce better barbecue. An instant read thermometer should be part of everyone’s arsenal of barbecue accessories. Know your finished temperatures for the cut of meat you are cooking and use it accordingly. In addition to cooking to temperature use your instant read thermometer to gauge the tenderness.
2. Know your cooker.
Know your cooker and how changes in airflow effect the temperature of the pit and the quality of smoke it’s producing. The only way to achieve this is to burn fires and play with your pits airflow. Know how to run your pits consistently between 225 degrees, and 275 degrees. Learn the difference between low and slow cooking, hot and fast cooking, and searing temps.
3. Pre-heat your cooker.
Pre-heating your cooker is often overlooked and it’s a very important step to achieving a long successful cook. I recommend starting your cooker a minimum of 1 hour prior to the start of any cook. Use this time to allow the pit to come up to cooking temperature, make any minor adjustments to air flow and maintain your cooking temperature for at least 30 minutes prior to placing food on your pit. This will prevent you from having to make adjustments in airflow while your food is on the pit and prevent the possibility of rolling dirty smoke across your cooking surface.
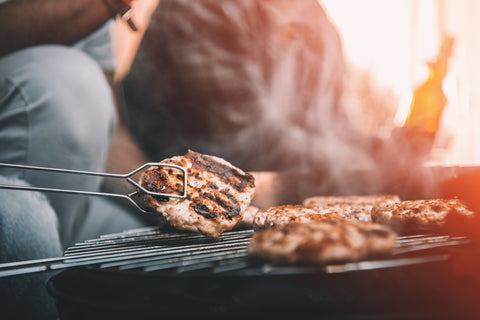
4. Utilize cooking zones.
This goes back to fundamental number two. Know your cooker, learn it’s hot spots and use them and/or avoid them accordingly. Learn how to set the cooker up for different cooking zones using indirect and direct cooking methods.
5. Avoid using lighter fluid.
If you are using charcoal as your fuel source, or charcoal to start an offset smoker, avoid using lighter fluid, or a “match light” charcoal. Lighter fluid tends to leave a chemical flavor on food, and nobody got time for that. This Especially important with ceramic grills or pits equipped with fire bricks. Ceramic and firebricks are a porous material and will absorb lighter fluid and hold in its odor. Instead use a charcoal chimney with paper or a quality quick light product to start your fire.
6. Refrigerator to pit.
You hear a lot of people talk about letting their meat rest on the counter to come up to room temperature prior to placing them on the grill. When it comes to smoking meats that is a flawed philosophy. Here’s why. The whole point of cooking on a smoker is to infuse your food with smoke flavor, right? By allowing food to come up to room temperature prior to placing it on the smoker it’s time you are taking away from infusing your food with smoke flavor. Most refrigerators are chilled between 37 and 40 degrees. In theory when food comes out of the refrigerator it should be close to the set temperature of the refrigerator. So let say you let your food rest on the counter and come up to 65 degrees prior to putting it on your pit. That’s approximately 28 degrees worth of time you are taking away from infusing your food with smoke flavor. Colder meat equals longer time on the smoker to be infused with smoke flavor.
7. Layer flavors.
We all have our favorite barbecue rub’s, seasonings, and spices. So why not combined them and try playing with different flavor profiles. For the most part every meat I cook starts with a light dusting of Salt, Pepper, and Garlic, then the flavors are layered from there. This also goes for fully cooked meats. In most cases, a light dusting of a quality salt or barbecue rub can wake up a dish and enhance the flavor profile.
8. Maintain your cookers and equipment.
This should go without saying but it’s often an overlooked task. I’m going to put this in very simple terms. Keep your cookers clean. This is especially important if you are using a pellet grill or doing a prolonged cook.
9. Use properly seasoned hardwoods and quality products.
If you have read our previous blog, you know how much emphasis we put on cooking with a properly seasoned hardwood. Wet and green wood can make for a dirty burning fire and leave your food with a bitter overpowering smoke flavor. This goes for charcoal too. We highly recommend burning a quality lump charcoal over budget friendly briquettes. This is not a dig at charcoal briquettes. There are some companies manufacturing quality charcoal briquettes, made from natural products.
10. Allow food to rest.
Lastly, allow time for your food to rest. Have a plan. The finished product of every cook starts well before there’s ever a flame in the cooking chamber. When planning your cooks account for time for it to rest. We recommend resting the “big cuts” (Brisket, pulled pork) in a warmer or cooler for at least one hour prior to slicing. If you are using a cooler to rest your meats allow them to rest on the counter for 20 to 30 minutes prior to placing them in the cooler. Pit directly to cooler can cause steam and the meat will continue to cook leaving you with an overcooked finished product.